Collect Beautiful Moments

It’s the first of the month so it’s time for a new challenge at Country View Challenges which is Vintage, and is being hosted by the lovely Craftyfield.

As Vintage is one of my favourite styles, this challenge gave me the excuse to create this old-fashioned distressed page using Tim Holtz products.

All the flowers on this page were stencilled using a Floral Stencil by Tim Holtz; first I used it to apply some Vintage Photo Distress Ink over the chipboard page and then some white gesso which I left it to dry overnight. I painted around the edges of the flowers and foliage using Ground Espresso Distress Ink to make them stand out more. Then, to give the white flowers and foliage more of a Vintage look, I dragged an Antique Linen Distress Ink pad over the top and then I splattered the Vintage Photo ink over the whole page. I added the script text using black Archival Ink and an Etcetera stamp set by Tim Holtz and the “Collect beautiful moments” wording, which was a Metallic sticker by Tim Holtz. To finish, I splattered the page with as white and black DecoArt acrylic paints.

For more inspiration please see the amazing creations from my fellow Design Team members over at Country View Challenges.

We are looking forward to seeing your makes and you never know, you might even win a £20 voucher for the shop, Country View Crafts! Before you enter your project though, please read the rules.

The blossoms on my page remind me of the ones on the apple trees in our garden, it seems that everything is in full bloom all of a sudden (smile!).

Stay safe and well! x

Thanks for joining me today! If you have any questions or comments, I would love to hear from you.

Challenges

As well as Country View Challenges, I’m pleased to be joining the following challenges:

Ally’s Angels Challenge Blog and their Challenge #70 – Anything Goes with my vintage art journal page.

Stencil Fun Challenge and their June Stencil Fun – Anything Goes challenge, as I had fun using the stencilling all the flowers on this page.

Advertisement

Steam Locomotive

Today I’m over at Country View Challenges sharing this Steam Locomotive journal page for this month’s Vehicles challenge.

I created this page using a steam locomotive image from a Voyages Fantastiques pad by Stamperia; as the image didn’t quite fit the page, I added some paper remnants to the edges and then extended the horizontal lines using a Cold Grey Faber-Castell marker. Next, I had lots of fun colouring the steam train, (like watercolour), using Peeled Patina, Vintage Photo, Weathered Wood and Hickory Smoke Distress Inks and to finish, a gold and a white Uni Ball gel pen. As I was colouring the steam at the top of the page, I extended the design onto the additional paper, using the Distress Inks and a black Faber-Castell fine line marker. I also coloured the sleepers and the foreground using Ground Espresso Distress Ink. To finish, I fussy cut the clock and the wording from the same Voyages Fantastiques pad by Stamperia, added them to the page and edged them using a black marker; the wording reads “There is nothing like a dream to create the future”.

I hope you are inspired to join our Vehicles challenge over at Country View Challenges too, if you do, you’ll have a chance to win a £20 voucher to use on the Country View Crafts.

Today I have a special treat courtesy of my dear friend, K, who is an exceptional photographer. She kindly sent me photos of probably the most famous steam locomotive, The Flying Scotsman, which she captured here appearing through the steam; isn’t it a stunning photo!

The Flying Scotsman still makes an appearance throughout the UK, and happens to be 100 years old this year – how amazing (smile!).

I hope that you are staying safe and well!

Thanks so much for joining me today! If you have any questions or comments, I would love to hear from you.

Challenges

As well as Country View Challenges, I’m pleased to be joining the following challenges:

LTSCB#74 – Anything Goes over at Love To Craft Challenge Blog with my Steam Locomotive page.

Submarine

It’s time for a new challenge at Country View Challenges, the lovely Monica is hosting this month and has chosen Vehicles.

I created a mixed media journal page and my choice of vehicle today, is a Submarine (smile!).

To create this page, I started by covering the background with Tarnished Brass and Brushed Pewter Distress Paints and left them to dry. Next, I coloured some Ranger Texture Paste with both of the paints and then stencilled them using a Thick Stencil Lady Vagabond Lifestyle Compass stencil by Stamperia. When dry, I covered the rivets and the textured metal checker plate panels using Ranger Glossy Accents; if you look closely, you can see the glossy shine on the panels. The submarine wording and images were cut from papers from a Sea World pad by Stamperia. I edged them using Ground Espresso Distress Ink and a Deep Sepia Faber-Castell marker, then layered them together. To finish, I applied Ranger Glossy Accents to the “Sea” wording, all the rivets and the two port holes on the papers.

For more inspiration please see the amazing creations from my fellow Design Team members over at Country View Challenges.

We are looking forward to seeing your makes and you never know, you might even win a £20 voucher for the shop, Country View Crafts! Before you enter your project though, please read the rules.

When recently walking around Lytham Hall, we were greeted by this huge tank (septic) that is being installed; it reminded me of a submarine – smile!

Stay safe and well! x

Thanks for joining me today! If you have any questions or comments, I would love to hear from you.

Challenges

As well as Country View Challenges, I’m pleased to be joining the following challenges:

Ally’s Angels Challenge Blog and their Challenge #69 – Anything Goes with my submarine art journal page.

Stencil Fun Challenge and their May Stencil Fun – Anything Goes with optional Flowers challenge, as I had fun using thstencil and texture paste to create this page.

Be Calm, Be Strong

Over at Sparkles Monthly Challenge, we are launching a new challenge today which is Men Only.

This journal page was created using Sir Vagabond in Japan papers and Backgrounds papers by Stamperia. I started by cutting a piece of blue paper, from the Sir Vagabond in Japan – Backgrounds paper pad, to fit the page. Then I layered some leftover Japanese written plaque paper pieces and the Japanese warrior over the top; he was fussy cut from the Sir Vagabond in Japan pad. The circular dragon was a topper from Hunkydory Crafts and the words “Be Calm, Be Strong” were from a Kaisercraft sticker sheet. To finish, I added the pretty gold flowers which were outline stickers.

I hope you’ll join us at Sparkles Monthly Challenge too, for more inspiration please check out the amazing papercraft projects from my Sparkles Buddies in the Design Team too; we would love for you to join us. Please be sure to check out the rules here.

I always find it hard to create masculine pages, but I had so much fun using these Stamperia papers to create this page and I love how it turned out; I hope you like it too!

I hope that you are staying safe and well!

Thanks for joining me today! If you have any questions or comments, I would love to hear from you.

Challenges

As well as Sparkles Monthly Challenge , I’m pleased to be joining the following challenges:

Art Journal Journey which is being hosted by the lovely Erika at her BioArtGal blog and she has chosen Seeing Red as her challenge; my Japanese warrior is wearing red.

Challenge #67 – Anything Goes over at Ally’s Angels Challenge Blog with my papercraft page.

Happy Valentine’s Day

Today I’m over at Country View Challenges sharing my “Happy Valentine’s Day” journal page for this month’s Be Sentimental challenge.

For the background, I covered the chipboard page with Lumberjack Plaid and Saltwater Taffy Distress Paints and left them to dry overnight. Using Kraft Cardstock – Classic papers from Tim Holtz, I die cut the prancing deer using a Delightful Deer Sizzix Thinlits set by Lisa Jones, the hearts using a Heartfelt Sizzix Bigz Die by Tim Holtz and the sentiment using an All Occasions Sizzix Thinlits set by Olivia Rose; they were all stuck in place using matte gel medium. To finish, I splattered the page with white DecoArt acrylic paint and added the white ceramic hearts.

I hope you are inspired to join our Be Sentimental challenge over at Country View Challenges too, if you do, you’ll have a chance to win a £20 voucher to use on the Country View Crafts.

The deer on this page were created using this Delightful Deer Sizzix Thinlits set by Lisa Jones and I was amazed to find not only the two prancing deer shown on the packaging but a third deer too; I can’t wait to use this adorable deer – perfect (smile!).

Stay safe and well!

Thanks so much for joining me today! If you have any questions or comments, I would love to hear from you.

Challenges

As well as Country View Challenges, I’m pleased to be joining the following challenges:

Art Journal Journey which is being hosted by the lovely Erika at her BioArtGal blog and she has chosen Seeing Red as her challenge which my page definitely is.

Challenge #67 – Anything Goes over at Ally’s Angels Challenge Blog with my Happy Valentine’s Day page.

MIUCB #63 – Anything Goes + optional no stamping over at Mix It Up Challenge Blog with my page which was created with no stamping.

Double D Challenges and their Hearts challenge with all the hearts on this Valentine’s page.

Time Machine

Today I’m over at Country View Challenges sharing my second art journal page for this month’s Time challenge.

For my Time Machine page, I started by covering the background with some design papers; the border on the left-hand side and clock panel on the right were from a Voyages Fantastique Paper Pad by Stamperia. The clock panel was ripped and then edged, like all the paper pieces, using Ground Espresso Distress Ink. I fussy cut the “Time Machine” image and clocks from the same Stamperia Pad and used some leftover Pocket Card pieces by Tim Holtz for the numbers and background ledger. They were arranged onto the page with a tag which I created using a Tag Collection Sizzix Framelits set by Tim Holtz. The tag was coloured using Ground Espresso, Tea Dye and Brushed Corduroy Distress Ink; I did this by applying the ink to an acrylic block, spritzing with water and then pressing the block onto the tag. I added a gold brad to the tag and some gold highlights using a gel pen and to finish, I applied some Ranger Glossy Accents around the brad and to the clogs and edges of the clock faces.

I hope you are inspired to join our Time challenge over at Country View Challenges too, if you do, you’ll have a chance to win a £20 voucher to use on the Country View Crafts.

Here are the papers that I collaged together to create this page. I hope you will join us too, it would be lovely to see you there (smile!).

Stay safe and well and thanks for joining me today! If you have any questions or comments, I would love to hear from you.

Challenges

As well as Country View Challenges, I’m pleased to be joining the following challenges:

MIUCB #63 – Anything Goes + optional no stamping over at Mix It Up Challenge Blog with my Time Machine page which was created with no stamping.

Friends are the flowers

Over at Sparkles Monthly Challenge, we are launching a new challenge today which is Friendship.

I had fun creating this page inspired by some beautiful summer roses in my friend’s garden (smile!).

I started by applying a piece of neutral paper over the background detailing lots of flowers. Then I added a flowery border sticker, along the left-hand side and right-hand side of the page, from a Floral Shoppe Graphic 45 Sticker Sheet. I stamped two flower heads onto some mixed media paper using a Flower Garden stamp set from Tim Holtz and black Archival Ink. Then I painted the flowers to match those on the Graphic 45 stickers using Lemon Yellow and Rose Madder Kuretake watercolours. I fussy cut the large flower head and die cut some buds using a Bloom Colourize Sizzix Thinlits set along with some leaves from some green Kraft Cardstock – Classic by Tim Holtz. I arranged them onto the page with a pretty tag, that was from the same Graphic 45 Sticker Sheet, adding a green satin ribbon; the tag reads “Friends are the flowers in the garden of life”.

I hope you’ll join us at Sparkles Monthly Challenge too, for more inspiration please check out the amazing Friendship designs from my Sparkles Buddies in the Design Team too; we would love for you to join us so please be sure to check out the rules here.

My dear friend loves gardening and here is one of the beautiful roses that she grows in her garden (smile!).

I hope that you are staying safe and well!

Thanks for joining me today! If you have any questions or comments, I would love to hear from you.

Challenges

As well as Sparkles Monthly Challenge , I’m pleased to be joining the following challenges:

LTCCB #159 – Anything Goes over at Love To Scrap Challenge Blog with my papercraft page.

Mischievous Cats’ Happy New Year Party

Hi everyone and a very Happy New Year to you all! 

Today I’m over at Country View Challenges celebrating the New Year for our Time Challenge; this page was created using Tim Holtz products, as these Mischievous Cats wanted to wish you a Happy New Year too!

I started by cutting some Tim Holtz Pocket Cards, that had different clock face and wallpaper designs on them, into pieces and then I covered the page with them by collaging them together using matte gel medium. Next I applied some white gesso to the edges of the card pieces to fill any gaps and I also applied it to create a frame around the page itself. I added the clock hands so each clock was striking midnight to signify the New Year; like the cats and letters, they were die cut from Black Kraft Cardstock – Classic by Tim Holtz. I arranged four of the Mischievous Cats Thinlits onto the page adding a measuring tape, for each of them to sit on, which were from a Numbers Remnant Rub-on Set by Tim Holtz. Next I die cut the wording using an Alphanumeric Tiny Thinlits set by Tim Holtz and then I added them to the green glitter bunting triangles which I created using Adhesive Deco Sheets 12pcs – Christmas by Tim Holtz. They were arranged onto the page with some black cotton which I wound around the Mischievous Cats tails and paws, and to finish I added some tiny green gemstones for the cats eyes – Happy New Year everyone!

For more inspiration, please see the amazing Time creations from my fellow Design Team members over at Country View Challenges.

I look forward to seeing what you make and you never know, you might even win a £20 voucher for the Country View Crafts shop! Before you enter, please read the rules!

With it being New Years Day today, me and my hubby are wishing you all the very best for 2023 too! x

Thanks for joining me today! If you have any questions or comments, I would love to hear from you.

Challenges

As well as Country View Challenges, I’m pleased to be joining the following challenges:

MIUCB #63 – Anything Goes + optional no stamping over at Mix It Up Challenge Blog with my Mischievous Cats’ Happy New Year Party page which was created with no stamping.

Thank You – Snowy Winter

As it’s the end of December, I’m sharing my last page for the Snowy Winter challenge over at Art Journal Journey which I’ve been hosting this month.

Thank you so much to everyone who joined me; I really appreciate all your kind comments and support throughout the month and have thoroughly enjoyed visiting your blogs and seeing all your wonderful artwork (smile!).

Please note: I took this photo earlier this week and will add any names I’ve missed when the challenge has finished (smile!).

My page celebrates all of you who joined in the fun and I chose to design a page full of gifts, like you’re artworks were this month. I started by die cutting lots of squares from different Christmas design papers by Docrafts and arranged them onto the page with some blue square stickers. Then I painted some Cracked Pistachio Distress Stain between the squares giving it an icy snowy look. When dry, I added lots of stickers to the squares and background; they included tags, presents, bells, snowman, trees, snowflakes and stars. Next I printed the names of those who joined the challenge using a Dymo LetraTag Label Maker and once stuck in place, I decorated them using some silver Stickles glitter and a sequin snowflake.

I hope you had as much fun as I did, I enjoyed creating snowy winter pages for this challenge whether it was in my mini journal or …

… in my A4 sized journal.

Thank you all for your participation and lovely comments, you made it such a joy to host this challenge!

I’d like to say a special thanks to Bleubeard & Elizabeth and the rest of the AJJ Team for asking me to be a guest host; it’s always a pleasure to join you!

Not only is tomorrow a New Year, it’s the start of a new month which brings a new challenge at Art Journal Journey and I can’t wait to see what the new theme is and say hello to our new host – see you there! 

I hope you’ve had a safe and happy Christmas. Wishing you all the very best for 2023! Hugs Jo x

Thanks for joining me and if you have any questions or comments, I would love to hear from you.

Rudolph the Red Nose Reindeer

Today I’m sharing another page over at Art Journal Journey for the challenge theme Snowy Winter; like me all you need to do is add snowflakes or include snow to your page.

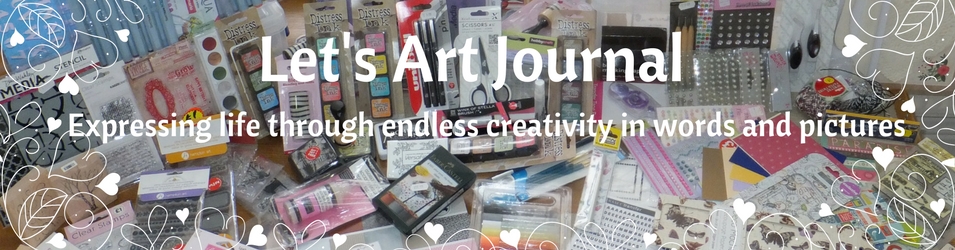
I started by covering the chipboard page with a used baby wipe that was stained blue using mop-up inks from previous projects; like all the paper elements it was stuck in place using Liquitex matte gel medium. The blue snowflakes were created from blue tissue paper using a Paper Snowflakes Mini Sizzix Thinlits set by Tim Holtz; they melted into the background beautifully. The deer was cut from some white cardstock using a Reindeer Bigz Die by Tim Holtz; it and was coloured using Antique Linen, Brushed Corduroy and Vintage Photo Distress Ink and a Dark Sepia Faber-Castell Pitt Pen. When stuck in place I added his nose which was a red mini pom-pom. I added some glittery foam snowflake stickers and some white glittery stars which were created using a Snowy Stars Sizzix Thinlits set by Tim Holtz and covered in Clear Sparkle Embossing Powder Glitter by Wow!. To finish, I added the “up in the clear sky” wording which was from a Tim Holtz Christmas Sticker Book.

I hope that you are inspired to join in the fun this month too! I’m really looking forward to visiting you and seeing all your wonderful Snowy Winter creations (smile!).

As T Stands for Tuesday and to continue the Rudolph theme, I thought I’d share this fun mug that we saw whilst out shopping – Happy T Day everyone!

Hoping that you’re all staying safe and sending you best wishes this holiday season! Hugs Jo x

Thanks for joining me today! If you have any questions or comments, I would love to hear from you.

Challenges

As well as Art Journal Journey, I’m pleased to be joining the following challenges:

Challenge #65 – Anything Goes over at Ally’s Angels Challenge Blog with my Rudolph Reindeer page.