Common Bar

I created this page to remember one of my birthday celebrations, so today we are going to the Common Bar in Blackpool which serves South American Street Food such as tacos and burritos. 

I started by covering the page with some decoupage paper with a palm leaf and bird design, sticking it in place using a glue stick. Next I stencilled the bricks over the top using Rusty Hinge, Brushed Corduroy and Vintage Photo Distress Inks and then I applied some Pébéo white gesso using a brayer. I added the tropical foliage and flowers to the bottom and left-hand side of the page and the “Happy Birthday” wording, which were all stickers by Kaisercraft. To finish, I used some colourful letters to create the “Common Bar” wording and surrounded them with tile border stickers which were from the same Kaisercraft Sticker Sheet.

Here’s a video showing what the Common Bar looks like inside; we were seated upstairs in a window seat overlooking the street.

We had the most wonderful time and enjoyed these Plain Nachos (I think they are called “plain” as they have the basic toppings).

We also had three types of Tacos (Pork Carnitas, Shredded Chicken Tinga and Chipotle Mushroom) with a side order of corn – all of which were delicious (smile!). Here’s their food menu if you’re interested.

Our drinks were super fun too; I had a Havana Nights Cocktail and my hubby had a Pump Up The Jam beer by Tiny Rebel, yes it did taste like a jam doughnut (double grin!) – Happy T Day for those over at T Stands for Tuesday and here’s their drinks menu too.

Challenges

I’m pleased to join the lovely Matilde from http://craftowanie.blogspot.com/ who is hosting this month at Art Journal Journey and her Birds challenge with the two birds on the decoupage paper that I used on this page (did you spot them both, here’s one of them blowing kisses your way – smile!).

I’ve been having fun using stencils on my pages and this was inspired by our Use A Stencil challenge over at Try it on Tuesday; there is still another week to join in the fun too!

Cherish Little Moments

We’ve been having some beautiful sunny days here of late and mild temperatures too, which have reminded me of summertime, I have even sseen my first butterfly on the drive in our front garden. So to celebrate I created this sunshiny yellow page with a butterfly – I hope you like it!

I started by using some stamped white paper which was leftover from other projects. It was stamped using black Archival Ink and the stamps included: a Music Sheet and a Vintage Circles stamp set from Woodware Craft Collection; a Cherish, a Script and also a Doily stamp set from Kaisercraft. The white paper also had some stencilling on it as I had used it to mop up some leftover Black Soot Distress Ink when I was cleaning a stencil using a baby wipe. I ripped the paper into pieces and stuck them onto the page using Liquitex matte gel medium along with three yellow paper flowers. Between the gaps of the papers and flowers I painted a base colour of Lemon Yellow Kuretake watercolour paint and then I dripped water onto the painted areas and added Black watercolour paint to create a marbling effect, highlighting areas with Yellow Ochre and more of the Lemon Yellow paint.

Once dry, I outlined the yellow flowers using a black Uni Pin marker and stuck some black seed beads into the centre of the flowers using Ranger Glossy Accents. The yellow border strips and wording are from Kaisercraft Sticker Sets and are outlined with a black Uni Pin marker. To finish, I added a black and white 3D butterfly sticker.

This page reminds me of the beautiful rudbeckia …

… that were flowering in our newly planted flower bed at the end of summer last year (grin!).

I added the 3D butterfly to my page as I was so surprised to find a Red Admiral butterfly sitting on our front drive last week, I know we have been having warmer temperatures but it is still February, isn’t it (double grin!).

Challenges

I’m glad I found out about Challenge Blogs as I enjoy taking part, they provide me with inspiration for my pages and are a wonderful way to meet like-minded arty people. So here are the challenges I’m joining today:

I’m pleased to be able to join the lovely Rike from rike’s art and her The Colour Yellow challenge over at Art Journal Journey with all the yellow that I added to my page.

Over at Country View Challenges their challenge is Black, White and One Other, so I’m happy to join this challenge to with my black, white and yellow page.

Thanks for joining me today! If you have any questions or comments, I would love to hear from you.

Here is a list of all the materials used to create this art journal page:

  • Kuretake Gansai Tambi Japanese Watercolour Paint set (Lemon Yellow, Black, Yellow Ochre)
  • Ranger Archival Ink (Jet Black)
  • Tim Holtz Distress Ink (Black Soot)
  • Uni Pin Fine Line marker (Black 0.5mm)
  • Woodware Craft Collection Clear Magic Singles (Music Sheet JGS111, Vintage Circles FRS665)
  • Kaisercraft clear stamp (Vintage – Cherish CS831, Script CS752, Doily CS297)
  • Viva Décor Universal Stencil (Past Times 900270300)
  • White paper
  • Craft Sensations (Paper Flowers CRO344/R)
  • Kaisercraft Sticker Sheet (Say Aloha SS281, Fiesta! SS284)
  • Seed Beads (Black)
  • Home Bargains Self-Adhesive Stickers (Beautiful Butterflies 22742)
  • Liquitex Matte Gel Medium
  • Ranger Glossy Accents

For the Boys

Still inspired by the masculine theme, I created this art journal page to remind you that you still have one week left to join in with our For the Boys challenge over at Try it on Tuesday, it would be lovely to see you there!

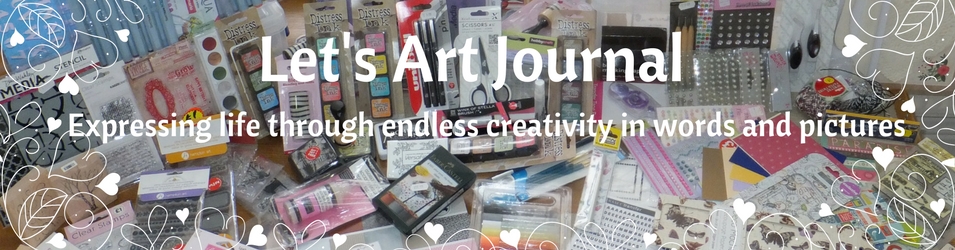
This time, I got creative with Tim Holtz inks, stamps and stickers as well as a Steampunk stamp set, some design paper and some Victorian style tags.

I started by using Tim Holtz Distress Inks to create the background; firstly by smooshing diluted Mowed Lawn ink that I had applied to an acrylic block, spritzed with water and then pressed onto the page. After drying this ink with a heat gun I then applied Shabby Shutters ink the same way and then I used both the Mowed Lawn and Shabby Shutters inks again to add A lot of Splats stamp from Gummpiapan. Using a blending tool I applied Hickory Smoke Distress Ink through a Past Times stencil by Viva Decor to give a lovely depth to the background, I also used the same stencil over the background to remove some of the Distress Inks using a baby wipe. Then I applied some Black Soot Distress Ink using a stencil by Craft Sensations and a blending tool. Next I layered all the different paper elements onto the page which I edged with Vintage Photo Distress Ink using a blending tool and outlined with a black Uni Pin marker once stuck in place. They included: a large map, ruler pieces, a butterfly, a button, some numbered and small alphabet pieces which are  Crowded Attic Salvage Stickers by Tim Holtz; three Victorian style tags; a globe with a bird perched on the top, suitcase and luggage labels which I fussy cut from design paper by Craft Sensations; a pocket watch and compass which I stamped using a Steampunk stamp set from Docrafts and black Archival Ink onto design paper and fussy cut out, they are stuck to the page using a UHU Stic; a vintage car from a Tim Holtz stamp which I stamped using black Archival Ink and fussy cut out; and finally some round button letters to add the “For the Boys” wording. I added some brown metal brads to the tags, luggage labels and signage. Then to finish, I used a paintbrush to splatter black and white DecoArt acrylic paints over the whole page.

Today I’m sharing a trip to the fish and chip shop in Great Eccleston.

The food is so delicious, here’s my order of steak and kidney pudding with gravy (of course – grin!), chips and mushy peas.

We visited with my family and my portion of food was so huge that I’m sharing my chips so here you can see just my dad’s fish and mushy peas – yum!

There are plenty of drinks on show in my photos for T Stands for Tuesday but in case you were wondering what I was drinking, it was Dandelion and Burdock. This is a fizzy/soft drink which is popular in the North of England and I haven’t had it since I was a child so couldn’t remember what it tasted like. I really enjoyed it and if you have never tried it either then it’s a bit like coca cola with an earthy botanical kick to it (grin!).

Challenges

I’m pleased to join the lovely Gill from gibbyfrogettcraftations who is hosting the Inspired by … challenge over at Art Journal Journey with my masculine inspired page.

As my art journal page features maps, luggage and a vintage car I’m very happy to be able to join Simon Says Stamp Monday Challenge and their Transport It challenge.

I added wording to my page as the challenge over at Country View Challenges is Written Word (add some text in some form), so I’m pleased to join them too.

This is my final page for A Vintage Journey and their Stencil It challenge, I’ve really enjoyed using my different stencils to join their theme this month and I had them in mind when I used all my different Tim Holtz products to create this Vintage and Mixed Media style page too.

Thanks for joining me today! If you have any questions or comments, I would love to hear from you.

Here is a list of all the materials used to create this art journal page:

  • Tim Holtz Distress Ink (Mowed Lawn, Shabby Shutters, Hickory Smoke, Black Soot, Vintage Photo)
  • Uni Pin Fine Line marker (Black 0.2mm)
  • Ranger Archival Ink (Jet Black)
  • Gummpiapan Stamps (A lot of Splats 11050106)
  • Viva Decor  Universal Stencil (Past Times 9002 703 00)
  • Craft Sensations (Deco Stencil Set 154892)
  • Docrafts Creativity Essentials A5 clear stamp set (Steampunk DCE907125)
  • Tim Holtz {Components} Collection Stamper Anonymous (COM013 CAR)
  • The Works Design Pad (Classic Vintage CRO707/TW7)
  • Craft Sensations Design Pad (Soft Colours CRO730/R)
  • Tim Holtz idea-ology Salvage Stickers (Crowded Attic #TH92898)
  • The Works (Victorian Style Embellishments)
  • Home Bargains (Love Letters 22738)
  • Craft Sensations (Brads CRO550/A)
  • UHU Stic

Coffee and Cake

As some of you may know from my last post, we recently went to the Blackpool Central Library and I was so inspired by the wonderful architecture and the fabulous interior that I have a few pages that I want to create.

You can find my first page here, which was inspired by one of the beautiful windows. The library also has a lovely café area for the community to use, which is a sanctuary for people from all walks of life that are looking for somewhere to make friends and find purpose. So my second page is inspired by a couple of fun romantic sayings that adorned the walls in this area.

As the library dates back to 1911 and is built in the Edwardian Baroque style, I wanted to create a vintage and ornate page to showcase the sayings from the signage we saw. I also choose the green and pink colour scheme to represent the masculine and feminine colours of the signage too. So I started by adding Picked Raspberry and Cracked Pistachio Distress Ink to the page using a blending tool and then I covered the page with a thin layer of white gesso to tone down the colours. I stencilled letters and numbers from a Past Times stencil by Viva Decor using Black Soot Distress Ink and a blending tool. Then I used some of the same stamps that I used on my first page, these being a Vintage-Cherish butterfly image and also a doily stamp, both by Kaisercraft, which I stamped onto the page using black Versafine Ink. Next I ripped pieces of two different decoupage papers from Poundworld that matched the Distress Ink colours and stuck them to the page using a UHU Stic. Before I stuck down the large pieces of decoupage paper I painted white gesso underneath so that there was a clean finish with no stamps showing through in readiness for the sayings. Once the glue had dried I doodled along the edges of the papers using a black Derwent Graphix marker. Next I stamped the two sayings, which were on the library wall, onto the decoupage paper using an alphabet stamp set by Hampton Art and black Versafine Ink. I added a coffee bean and cupcake alongside the sayings, as well as the coffee pots and cake stands which are all outline stickers, then I outlined them with a black Uni Pin marker. I used Glitterations border stickers to add the black lines and I also added some vintage flower 3D stickers. I fussy cut the heart and cupid image from a card making kit, edged it with a black Sharpie marker and stuck it to the page using double-sided foam tape. To finish, I painted glitter glue onto the 3D flowers and cupid wings to add some extra sparkle.

With the bright colours that I chose for my page, I’m pleased to be able to join the “Colour in my World” theme hosted by Yvonne from Meggy’s Way over at Art Journal Journey.

These are the two sayings that inspired my page and as T Stands for Tuesday I’m saying a big hello to the T Gang and wishing you all a Happy T Day!

The library café has a pretty seating area and there are several signs on the walls to choose from, I’d be interested to know which saying/s you like the most? They are:

“You’re the cream in my coffee”
“You’re the icing on the cake”
“Have you’re cake and eat it”
“Tea for two…and…two for tea”
“Check for dormice”
“I never laugh until I’ve had my coffee”

Thanks for joining me today! If you have any questions or comments, I would love to hear from you.

Here is a list of all the materials used to create this art journal page:

  • Pébéo White Gesso
  • Tim Holtz Distress Ink (Picked Raspberry, Crushed Pistachio, Black Soot)
  • Tsukineko Versafine Ink (Onyx Black)
  • Faber-Castell Big Brush Pitt artist pen (Black 199)
  • Sharpie Fine Point Permanent Marker (Black)
  • Derwent Graphik Line Marker (Black 0.05mm)
  • Uni Pin Fine Line marker (Black 0.1mm)
  • Kaisercraft clear stamp (Vintage-Cherish CS831, Doily CS297)
  • Hampton Art Mini Wood Peg Rubber Stamps (Alphabet Set #1037)
  • Viva Décor Universal Stencil (Past Times 900270300)
  • Poundworld (Patch Paper DS9454)
  • Docrafts Papermania Decoupage Card Kit (Victorian Valentine PMA169102)
  • Free & Easy Stickers (3D Stickers 1150ENF)
  • Anita’s Outline Stickers (Alice in Wonderland ANT810116)
  • Docrafts Glitterations (Black Borders ANT8181015)
  • The Range (3D Glitter Glue Pen GLT4321000)
  • UHU Stic
  • The Range double-sided foam tape

Always bring your own sunshine

Seeing sunflowers in people’s gardens reminded me of a lovely surprise we saw whilst walking along our local beach last October. A single sunflower was actually growing and flowering right on the beach front. To capture this happy memory I created “Always bring your own sunshine”.

As I included one of my favourite quotes I’m pleased to join the “Poetry in Motion” challenge over at Art Journal Journey too.

To start I used a small brayer to layer yellow, blue, parchment and white acrylic paint onto the page; I didn’t let each colour dry completely before applying the next so that the colours would blend a little. I stamped a diamond design by Art Impressions and also a heart/circle design by Sugarloaf Inc. using black Archival Ink. Then I used the brayer again to add white gesso over the top to tone them down and produce a layered effect. Next I added fine splatters of the black acrylic paint using a paintbrush. I stencilled a clock face by Craft Sensations using Black Soot Distress Ink with a blending tool, this depicts turning back the time, as I am remembering seeing the sunflower in October last year. I also stencilled some cogs by Viva Décor using the same Black Soot ink in the right-hand corner around the clock face and on the top left of the page. The sunflowers are rub-on transfers by Royal & Langnickel, and I used a black Uni Pin marker and a white Uniball gel pen to add extra detail. I then added white acrylic paint splatters over the sunflowers and the rest of the page. I had some dried gesso that had formed on the top of the paint tube so I stuck these on with a UHU Stic to continue the grunge feel. I added a pretty fabric tag and then I stamped the wording around the edge of the clock using black Archival Ink. To finish, I went over the wording with a black Uni Pin pen to make it stand out more. I really like the beach colours and urban street art feel of this piece.

I thought you might like to see the solitary sunflower on our beach, here it is – we couldn’t believe our eyes when we saw it shining at the edge of the sand dunes, I’m not sure how it got there, birds maybe (grin!).

We first discovered this little sunflower when we were volunteering at Beach Care for Love My Beach, you can see my hubby to the left of the picture. We join this group every week to keep our local beach and bathing waters clean. It’s a great way to actively help the environment, care for sea life, meet people and just give something back to the community; we always have so much fun too!

The next day we were walking with one of our friends and went back for another look, she kindly took this picture of us. It reminds me of summer days and you never know maybe we will see another sunflower on our beach and if not, as the saying goes you can “Always bring your own sunshine!”

“Poetry in Motion”

Thanks for joining me today! If you have any questions or comments, I would love to hear from you.

Here is a list of all the materials used to create this art journal page:

  • Pébéo White Gesso
  • Liquitex Artist Color Acrylic (Swedish Blue, Parchment, Cadmium yellow Medium)
  • DecoArt Crafter’s Acrylic (White)
  • Tim Holtz Distress Ink (Black Soot)
  • Ranger Archival Ink (Jet Black)
  • Uni Pin Fine Line marker (Black 0.1mm & 0.5mm)
  • Uniball Signo gel pen (White)
  • Art Impressions wood mounted rubber stamp (Diamond Background T-3335)
  • Sugarloaf Inc. Anita’s wood mounted rubber stamp (26645)
  • Dovecraft Essentials Alphabet Stamp Set (WDN ALPHA STMP DCV0050)
  • Craft Sensations (Deco Stencil Set 154892)
  • Viva Décor Universal Stencil (Past Times 900270300)
  • Ranger Brayer (Small 2 ¼ inch)
  • Royal & Langnickel Rub-on Transfers (REC1683)
  • The Works (Canvas Floral Tags)
  • UHU Stic

The Possibilities are Endless

I hope you’re all enjoying this month’s theme “Poetry in Motion” over at Art Journal Journey.  Today I have created a steampunk page using leftover materials from previous projects to depict “Dream, hope, believe … and the possibilities are endless”.

I started by applying the inks onto the page, which were leftover from a 21st birthday card that I had made; this involved dripping the remaining diluted blue Distress Ink from an acrylic block onto the page and letting it dry, then applying the leftover black Distress Ink that was on my blending tool using a Viva Décor stencil that I had also used for the card. As you can see, I moved the stencil around the page to produce a lovely shaded effect as the leftover ink was gradually used up. I then added leftover letters from a set of rub-on transfers by Letraset to give a grunge look to the page. Next I stamped three frames, some postal marks and texture stamps by The Works and a key image by Royal & Langnickel using black Archival Ink. To start my sentiment I added the words “dream; hope; believe” which are rub-on transfers by Royal & Langnickel. I stamped the rest of the sentiment onto a piece of white tissue paper using black Archival Ink and stuck it onto the tag using a UHU Stic. The tag was also leftover from a previous project; I had stamped a Kaisercraft Script stamp using black Archival Ink over the whole tag, edged it with Tea Dye Distress Ink, drawn a stitched look border using a black Uni Pin marker and tied on some paper twine which I distressed using the same Tea Dye ink. I also stamped the texture and key stamps onto the tag so it matched the page background. I outlined the edges of the tissue paper and the letters on the tag with a white Uniball gel pen and stuck it to the page using double-sided foam tape. Then I used the Royal & Langnickel rub-on transfers again to add the “dream; hope; believe” definitions around the sides of the page. To finish, I sourced three postage stamps from my hubby’s childhood stamp collection that tied into the steampunk feel. They are all from Great Britain and I placed them inside the stamped frames using double-sided foam tape.

Here’s the 21st Birthday card that I made for one of my godsons, like my page it has a steampunk feel to it. I find like many of my projects that I had some bits and pieces left over, so I was inspired to create a page from leftovers to demonstrate that the possibilities are endless!

I hope you also think that the possibilities are endless for this month’s theme “Poetry in Motion” over at Art Journal Journey. I’m so looking forward to visiting you and seeing your creations. Thanks for joining me today!

If you have any questions or comments, I would love to hear from you.

Here is a list of all the materials used to create this art journal page:

  • Tim Holtz Distress Ink (Black Soot, Peacock Feathers, Tea Dye)
  • Ranger Archival Ink (Jet Black)
  • Faber-Castell Big Brush Pitt artist pen (Black 199)
  • Uni Pin Fine Line marker (Black 0.1mm)
  • Uniball Signo gel pen (White)
  • The Works clear stamps (CRO274/TW3)
  • Royal & Langnickel Clear Choice Stamps (Journey MIN-CCS104)
  • Viva Décor Universal Stencil (Past Times 9002 703 00)
  • Kaisercraft clear stamp (Script CS752)
  • Dovecraft lower case alphabet stamp set (WDN ALPHA STMP DCVW0050)
  • White tissue paper
  • Hobbycraft (Kraft Medium Luggage Tag 5776581000)
  • Letraset Transfer (Helvetica Bold Condensed 5mm RDC0251)
  • Royal & Langnickel Rub-on sentiments (Motivate Sentiments #ROY510 RUB-ON)
  • Postage stamps (Great Britain 1972, 1975)
  • Wilko (10m Paper Twine 0314169)
  • UHU Stic
  • The Range Double-sided foam tape

Be Happy, Be Bright, Be You

When I started this page I didn’t have any real direction, so I asked my hubby to choose the media and some random colours for my background. He chose a set of brightly coloured Distress Inks; I’m not surprised that he chose these colours as he always prefers vibrant, bright ones. His choice linked perfectly with a saying that always makes me smile “Be Happy, Be Bright, Be You”, so I created this page to link to this month’s theme “Poetry in Motion” over at Art Journal Journey.

I started by stencilling a piece of white card and also the page with modelling paste using a Viva Décor Universal Stencil called Past Times. The paste is mixed with black acrylic paint to turn it black and was left over from a greeting card that I made. Once you add paint to modelling paste it becomes wetter and takes longer to dry, so I left it overnight to dry out completely. Next I took Peacock Feathers, Picked Raspberry, Spiced Marmalade and Mustard Seed Distress Inks that my hubby had chosen and applied patches of colour to the page using a blending tool keeping the colour in vertical stripes. I also applied the ink pads directly to an acrylic block, spritzed the block with water and pressed it onto the page allowing the different colours to blend where the stripes joined.  Using the block again, I dripped diluted inks onto the page, so they pooled and ran down between the modelling paste when the page was tilted to create channels of colour. I fussy cut the cogs that I had stencilled on the white card and then applied the same Distress Inks, they are stuck to the page using double-sided foam tape to add more dimension. The words are stamped using black Archival Ink on craft tags, which I coloured with the same Distress Inks using a blending tool as well as diluting the ink with water and flicking it onto the tags using a paintbrush. To finish, I added gemstones to the cog centres.

Of late I have been thinking of our Annual International Kite Festival which is normally held on our local beach in August, but this year it’s been scheduled for September instead because of the tides (being a beach event this festival is completely tide dependent and so they choose dates when there is a low tide). As always I’m looking forward to the festival and this colourful and happy page reminds me of the festival’s Samba Sunday and in particular this dancer, who we saw last year – doesn’t she look fabulous!

Here’s the Samba procession as it winds it way down the promenade to the beach and pier. It is fun to watch the dancers, listen to the music and follow the parade; aren’t the costumes amazing!

The band is wonderful and the music is very uplifting. If you are interested, here are some fun facts about samba:

  • Samba music is carnival rhythms which originate in Brazil.
  • The Samba dance is lively, rhythmical and full of energy.
  • The music is played with different instruments, this includes: Bass drums (known as surdo drums) which are used to keep a steady beat; Snare drums; A whistle called an apito which is used by the band leader to begin and end sections of music; as well as other types of un-tuned percussion and different bells.
  • The musicians move along with the dancers. As such most samba drums are made of very light material so that they can be carried through the streets for hours on end.
  • The music is very loud, which is similar to other drumming bands, so it attracts listeners.

I think the Samba dancers and band also encompass the words “Be Happy, Be Bright, Be You”.

I would just like to offer a special thank you for all the lovely supportive comments I have received, and for the wonderful pages that have already been linked to the “Poetry in Motion” theme over at Art Journal Journey! If you want to join in the fun too then all you need to do is link a page that you have created which has been inspired by your favourite poem, quote or saying. I look forward to seeing you there!

Thanks for joining me today! If you have any questions or comments, I would love to hear from you.

Here is a list of all the materials used to create this art journal page:

  • Pébéo Modeling Paste High Density
  • Liquitex Artist Colour Acrylic (Ivory Black)
  • Tim Holtz Distress Ink (Peacock Feathers, Picked Raspberry, Spiced Marmalade, Mustard Seed)
  • Ranger Archival Ink (Jet Black)
  • Faber-Castell Big Brush artist pen (Black 199)
  • Uni Pin Fine Line marker (Black 0.1mm and 0.8mm)
  • Viva Décor Universal Stencil (Past Times 9002 703 00)
  • Docrafts A5 clear stamp set (Alphas Folk DCE907115)
  • The Works (Assorted Craft Tags)
  • Poundland (504 Gems)
  • White card stock
  • The Range double-sided foam tape